
How to Remove Old Window Screen Spline: A DIY Guide


Table of Contents
- What You’ll Need Before You Start
- How to Remove Old Window Screen Spline: Step-by-Step
- Best Tools for Screen Spline Removal
- How to Measure Window Screen Spline Size
- Common Mistakes When Replacing Window Screen Spline
- When to Call a Pro vs. DIY
- Frequently Asked Questions
Last Updated: October 4, 2026
What You’ll Need Before You Start
Learning how to remove old window screen spline decides whether rescreening takes twenty minutes or two frustrating hours.
Old spline hardens, sticks to the channel, and sometimes hides under paint.
The good news? You need very few tools, and none are expensive.
What you’ll need:
- A flathead screwdriver or a dedicated spline removal tool
- Needle-nose pliers
- A utility knife
Skip the butter knife. A dull blade slips and gouges the aluminum frame. A proper flathead or spline tool gives you control at the exact angle you need.
Work on a flat, stable surface, a picnic table or sawhorses beat the ground. If the frame twists while you pry, you’ll fight it for the rest of the job.
How to Remove Old Window Screen Spline: Step-by-Step
Removing old spline takes five to ten minutes per screen once you know the technique: find the end, pry it loose, pull it out, then clean the channel before installing anything new.
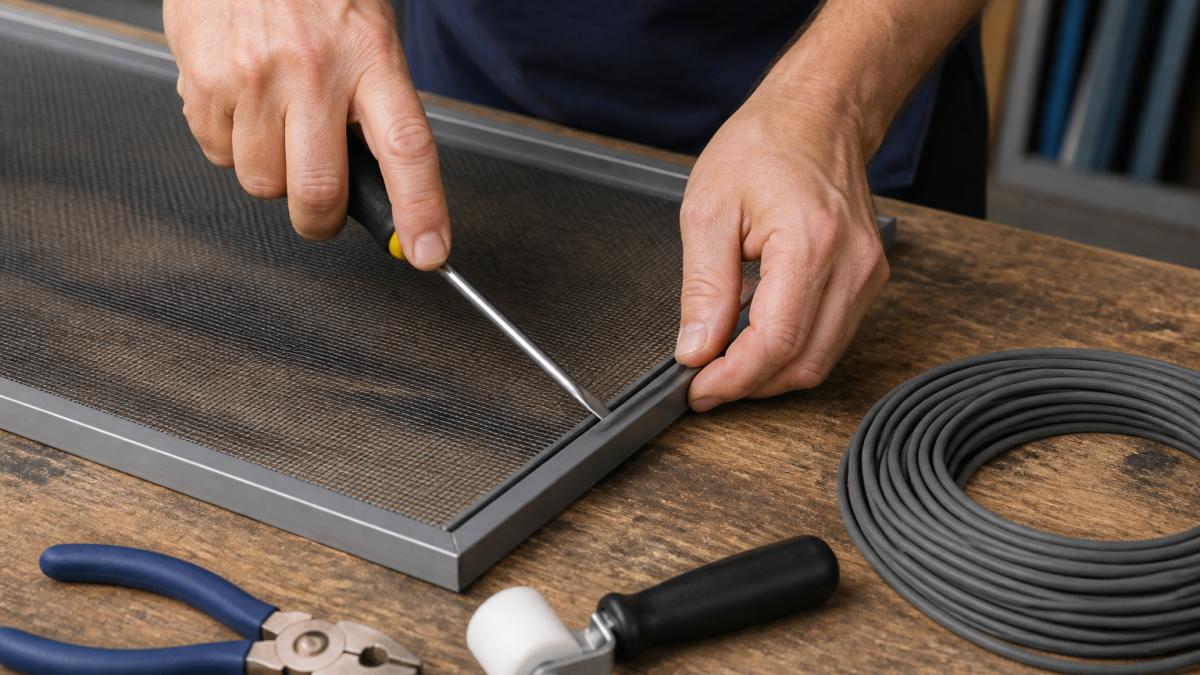
Here’s the version that works when spline has sat in the sun for fifteen years, accounting for what the strip is made of and what’s been painted over it.
Step 1: Identify What Your Spline Is Made Of
Before you touch a tool, press a thumbnail into the spline. The material changes how you remove it, and most guides skip this.
- Vinyl (PVC) spline, firm, smooth, slightly glossy. Hardens with UV exposure but usually pulls out in long runs. Most common on screens made in the last 30 years.
- Foam (closed-cell) spline, soft, squishy, matte. Compresses into the groove and often crumbles or tears into chunks instead of pulling free. Common on older or uneven channels because it fills gaps.
- Rubber (EPDM) spline, dull, slightly tacky, grippy. Bonds to aluminum over time and is the most likely to snap mid-pull.
If unsure, cut a one-inch sample from a loose tail and bend it: vinyl creases and holds the fold, foam springs back, rubber stretches before it breaks.
Foam spline almost never pulls out in one piece. Plan to slice it into sections from the start rather than fighting a strip that’s going to disintegrate anyway.
Step 2: Locate the Spline End
The spline end is the loose tail where the strip stops and tucks into the frame groove. Check each corner, one usually has a visible tail, a raised bump, or a spot where the rubber lifts from the channel.
If nothing is obvious, run your fingertip along the groove, you’ll feel a small gap or raised lip. Try corners first, then the middle of the longest edge; installers often start and stop on a long run rather than a corner.
Step 3: Free Painted-Over Spline Before You Pry
This step separates a clean removal from a chipped, scratched frame. If your frame was painted while the spline was installed, common on older homes, the paint has bridged across the spline and locked it into the channel.
Do not pry first. Score first.
- Run a utility knife along both edges of the spline, where rubber meets aluminum, using light single passes, you’re cutting the paint bridge, not the metal.
- Score the same line at each end of the run.
- Slide your flathead under the tail. The spline should release in one piece instead of tearing paint flakes into the channel.
Older frames often have two or three paint layers, score through all of them. If the blade drags, you’re cutting into aluminum; back off and use a fresh blade.
Never pry painted spline without scoring. Forcing it chips the paint into the groove, and those chips stop new spline from seating. You’ll be picking paint flakes out with a screwdriver for an hour.
Step 4: Pry and Pull, With Frame Protection
Slide your flathead under the spline tail at a shallow angle and lift gently, pop the rubber out, don’t dig into the aluminum.
Protect the frame finish while you work:
- Tape the frame edge with painter’s tape on both sides of the groove. Thirty seconds prevents the scratches that show up on every DIY rescreen.
- Wrap the screwdriver tip with electrical tape on finished or anodized frames to soften contact without killing leverage.
- Pry against the groove wall, not the frame face. The channel lip is thicker and takes the load better.
Once you’ve freed an inch or two, grab the tail with needle-nose pliers and pull. On healthy vinyl, the spline slides out in one long strip.
On an old screen, it won’t. Which brings us to the part most guides skip.
If the spline snaps every few inches, stop pulling and switch to prying. Tugging on brittle spline can bend the frame edge and crack the mesh channel. Pry in short sections instead.
Step 5: Cut Brittle Spline Into Sections
When spline is hardened, bonded, or foam-based, pulling the whole strip is a losing fight. Switch to section removal:
- Slide the utility knife under the spline about 6 to 8 inches from the freed end.
- Cut straight down through the spline, not into the channel.
- Pry that section out with the flathead, working from the cut end.
- Repeat down the run.
Short sections give you a fresh grip point every few inches and keep you from levering against the whole strip. On fully bonded rubber spline, this is the only method that works without damaging the frame.
Step 6: Clean the Spline Groove
Old spline leaves behind grit, dried rubber, paint flakes, and sometimes sticky residue. That debris stops new spline from seating, and a loose seat means a saggy screen.
Run a stiff brush or vacuum crevice tool down the channel and pick out stuck rubber with your screwdriver tip.
The channel should look bare and feel smooth, if not, keep cleaning. This boring step saves you a redo.
Step 7: Inspect the Channel Before You Reinstall
Run a fingertip down the empty groove, checking for three things:
- Bent channel lips, a crushed or rolled edge won’t grip new spline. Straighten gently with pliers if the bend is minor.
- Cracked or corroded aluminum, white powdery oxidation or a visible split means the frame is compromised. New spline won’t fix it.
- Widened grooves, if the channel has been pried hard before, it may be stretched. A slightly thicker spline can compensate; a badly deformed channel can’t.
If the channel passes, you’re ready to install new mesh and spline. If it fails, the frame, not the spline, is the problem.
Best Tools for Screen Spline Removal
The best tools for screen spline removal are a flathead screwdriver, needle-nose pliers, and a utility knife.
But the right tool depends on your spline material and whether it’s been painted over. Here’s how the common options compare, plus two items most guides leave out.
| Tool | What It’s For | Best For |
|---|---|---|
| Flathead screwdriver | Prying spline from the groove | Most DIY jobs |
| Needle-nose pliers | Gripping and pulling the tail | Stubborn or short ends |
| Utility knife | Scoring paint, cutting spline into sections | Painted-over or brittle spline |
| Spline removal tool | Dedicated hook for the channel | Frequent rescreening |
| Stiff brush | Cleaning out debris | Every job |
| Painter’s tape | Protecting the frame finish | Finished or anodized frames |
| Isopropyl alcohol + rag | Removing tacky rubber residue | Old rubber or foam spline |
A slotted screwdriver works in place of a flathead, and most homeowners own one. The dedicated removal tool pays off only if you rescreen often or tackle a whole house.
Match the Tool to the Spline Material
Most tool lists treat every spline the same. They aren’t.
- Vinyl spline: A flathead and pliers handle it. Vinyl pulls in one piece, so the utility knife is only for scoring paint or trimming the tail.
- Foam spline: The utility knife is your primary tool. Foam crumbles instead of pulling, so slice it into 6-to-8-inch sections and pry each out. Pliers are nearly useless, there’s nothing solid to grip.
- Rubber (EPDM) spline: Needle-nose pliers and a utility knife together. Rubber bonds to aluminum and snaps under tension, so cut a section, pry the freed end, and grip with pliers only on short pulls.
Two Tools Most Guides Skip
Painter’s tape. The most common complaint after a DIY rescreen is scratched aluminum. Taping both sides of the groove before you pry costs almost nothing and prevents permanent damage on finished, anodized, or painted frames.
Isopropyl alcohol and a rag. Degraded rubber spline leaves tacky residue a dry brush won’t remove; isopropyl alcohol cuts it clean. Avoid oil-based cleaners, they leave a film that stops new spline from gripping.
What the Utility Knife Is Actually For
What most guides miss is the utility knife’s real job. It isn’t for cutting mesh. It’s for two things:
- Scoring painted-over spline free from the frame before you pry, so paint doesn’t chip into the channel.
- Slicing deteriorated spline into sections so you can pry each piece out without fighting the whole strip.
Use a fresh blade, a dull one drags, slips, and is the most common cause of cut fingers here. Change it the moment it tears rather than slices.
Buy blades in a pack of 10 and swap them out mid-job if you’re doing more than two screens. A sharp blade is safer than a dull one because it goes where you aim it.
Safety With the Utility Knife
A utility knife is the only genuinely dangerous tool in this kit. Three habits keep it safe:
- Cut away from your body, never toward your free hand. Brace the frame so it can’t shift mid-cut.
- Use light, multiple passes instead of one deep cut, more control, less chance of the blade jumping the score line.
- Retract the blade every time you set the knife down. Most cuts happen during handling, not cutting.
When the Dedicated Removal Tool Is Worth It
A spline removal tool is a handle with a curved hook sized to ride the channel and lift spline in one motion. It’s faster and less likely to scratch than a flathead, but only pays off if you rescreen several screens or do it regularly. For a single window, a taped flathead does the same job.
How to Measure Window Screen Spline Size
Window screen spline size is measured by the diameter of the groove it sits in, usually sold in fractions of an inch.
Measure the empty channel’s width with a ruler or calipers. Match that number to the spline diameter on the package.
If you’re between sizes, go slightly larger. Too thin won’t hold the mesh tight; a touch thick still seats with firm roller pressure.
Quick size check:
- Measure the groove width (not the old spline, which may have shrunk)
- Round to the nearest common size
- Buy a little extra length for mistakes
Measure the empty channel, not the old spline. Rubber shrinks and flattens over time, so a worn strip will read smaller than the groove it came out of.
Vinyl spline is the standard choice for most homes. Foam works better on uneven or older channels because it compresses and fills gaps. Check texture if unsure: vinyl is firm and smooth, foam is soft and squishy.
Common Mistakes When Replacing Window Screen Spline
The most common mistakes when replacing window screen spline are prying too hard, skipping channel cleaning, and using the wrong spline size. Each turns a quick job into a repeat job.
Watch for these:
- Brute force on the pry. You’ll bend the frame edge and never get the screen flat again.
- Leaving debris in the groove. New spline won’t seat and mesh sags within weeks.
- Reusing the old spline. It’s stretched and brittle and won’t hold tension.
That last one deserves its own note. If your frame was painted while installed, the spline may be sealed under latex.
On disposal: old spline, torn mesh, and paint chips don’t belong in recycling.
When to Call a Pro vs. DIY
DIY spline removal makes sense for one or two screens with intact frames. Call a pro when the frame is bent, the channel is cracked, or you’re replacing every screen in the house.
Go DIY if:
- The frame is straight and corners are solid
- You’re replacing spline on a single window
- You enjoy the work and have an afternoon
Call a pro if:
- The aluminum is bent or corners are loose
- The channel is cracked or corroded
- You need a dozen screens done right the first time
For homeowners who’d rather skip the job entirely, Best Custom Screens builds fully assembled, custom-sized screens that arrive ready to install. You can check current lead times and product details when you’re ready to replace rather than repair.
Homeowners with pet damage, odd-sized 1970s window openings, or a whole house of worn screens who want a ready-to-install replacement instead of a weekend project.
Removing old spline is a job you can absolutely do yourself, but it’s also the moment many homeowners realize their frames are past saving.
Frequently Asked Questions
What tool can I use to remove screen spline?
A flathead screwdriver or a dedicated spline removal tool works best. For stubborn spline, try needle-nose pliers to grip and pull. Avoid sharp tools that can scratch the frame. If the spline is brittle, a utility knife can help score it first.
Can you reuse old screen spline?
Reusing old spline is not recommended. It often becomes brittle, stretched, or compressed over time, which can lead to a loose screen or poor seal. New spline is inexpensive and ensures a tight fit. Always replace spline when rescreening.
How do I know what size spline to buy?
Measure the old spline’s diameter with a caliper or compare it to a spline sizing gauge. Common sizes range from 0.125 to 0.250 inches. If the old spline is too degraded, measure the width of the groove in the frame and subtract a small amount for compression.
Is it necessary to replace the spline when rescreening?
Yes, replacing the spline is necessary for a secure fit. Old spline loses elasticity and may not hold the new screen tightly. It can also be painted over or filled with debris. New spline ensures the screen stays in place and extends the life of your repair.