
How to Measure Windows for Custom Screens


Table of Contents
- Window Screen Measuring Tools You’ll Need
- How to Measure for Window Screen Replacement: Step-by-Step
- Measuring Window Screen Frame Depth
- How to Measure Windows for Custom Screens on Single-Hung Frames
- Troubleshooting Out-of-Square Windows
- Measuring for Solar Screens vs. Standard Mesh
- Your Measurement Record Worksheet
- Conclusion
- Frequently Asked Questions
Last Updated: August 31, 2026
Getting accurate measurements is the single most important step in the entire custom screen process. This guide on how to measure windows for custom screens walks you through every step, from the tools you need to handling tricky situations most guides ignore.
We’ll cover the exact measurement process for inside and outside mounts, how to identify your screen channel type, what to do when your window isn’t square, and how solar screens differ from standard mesh. By the end, you’ll have everything you need to order a screen that fits the first time.
Window Screen Measuring Tools You’ll Need
Accurate measurement starts with the right tools. Here’s what you need:
- Steel measuring tape (at least 10 feet): A rigid metal tape holds its shape across wide openings. Cloth tapes stretch and introduce error.
- Pencil and notepad: Write every measurement down immediately.
- Level: Confirms whether a window sill or head jamb is plumb and square.
- Small ruler or depth gauge: For measuring screen channel depth and frame thickness.
- Flashlight: Useful for inspecting dark corners and identifying the channel type.
A second set of hands is invaluable for holding one end of the tape across wide openings, reducing flex and misread errors.
Write measurements in width × height order, always. This matches the standard format used by screen fabricators and prevents transposition errors when you submit your order.
How to Measure for Window Screen Replacement: Step-by-Step
The process follows a clear sequence: measure width first, then height, then apply the correct deduction for your mount type.
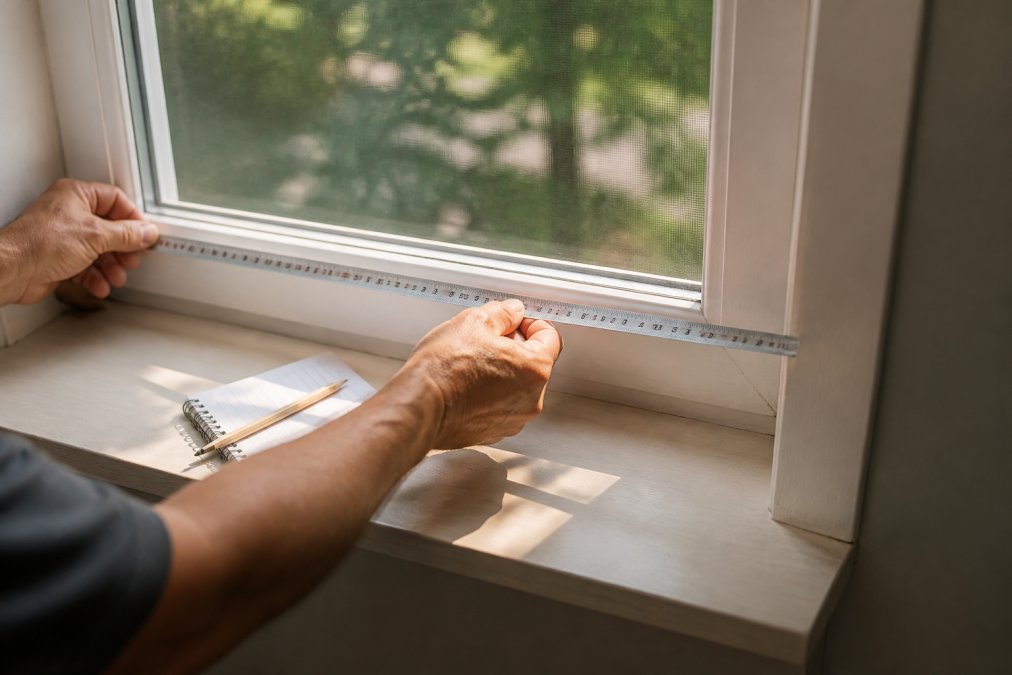
Step 1: Measure the Width of the Window Opening
Measure the width at three points: near the top, at the middle, and near the bottom. Record all three measurements and use the smallest. A screen built to the widest measurement won’t slide in at the narrow point.
For inside mount screens, you’ll subtract a tolerance deduction from this number. For outside mount screens, you’ll add to it.
Measure to the nearest 1/16 inch (nist.gov). Rounding to the nearest 1/4 inch is the most common homeowner mistake and causes fit problems.
Step 2: Measure the Height of the Window Opening
Measure the height from the window sill to the head jamb at three points: left side, center, and right side. Record all three and use the smallest.
If your three height readings differ by more than 1/4 inch, your window opening isn’t square; see the troubleshooting section below before proceeding.
For single-hung and double-hung windows, measure only the screen area, not the full sash height. Confirm this against your existing screen or channel location before measuring.
Step 3: Apply the Correct Tolerance Deduction
A tolerance deduction is the small amount subtracted from your raw measurements to ensure the screen fits into the channel without binding.
Standard deductions for inside mount screens:
- Width: Subtract 1/8 inch from the smallest width measurement
- Height: Subtract 1/8 inch from the smallest height measurement
Some screen channel systems require a 1/16 inch deduction instead. Consult the specification for your specific frame or channel type. When in doubt, 1/8 inch is the safer default.
For outside mount screens, add 1 inch to both dimensions to ensure adequate overlap and a weather-tight fit.
| Mount Type | Width Adjustment | Height Adjustment |
|---|---|---|
| Inside mount | Subtract 1/8 inch | Subtract 1/8 inch |
| Outside mount | Add 1 inch | Add 1 inch |
| Channel replacement | Subtract 1/16 to 1/8 inch | Subtract 1/16 to 1/8 inch |
Never skip the tolerance deduction for inside mount screens. A screen built to the exact raw measurement will bind in the channel and may bow or buckle during installation, damaging both the screen and the frame.
Measuring Window Screen Frame Depth
Frame depth is the measurement most homeowners forget, and it determines whether a replacement screen will seat properly in the channel.
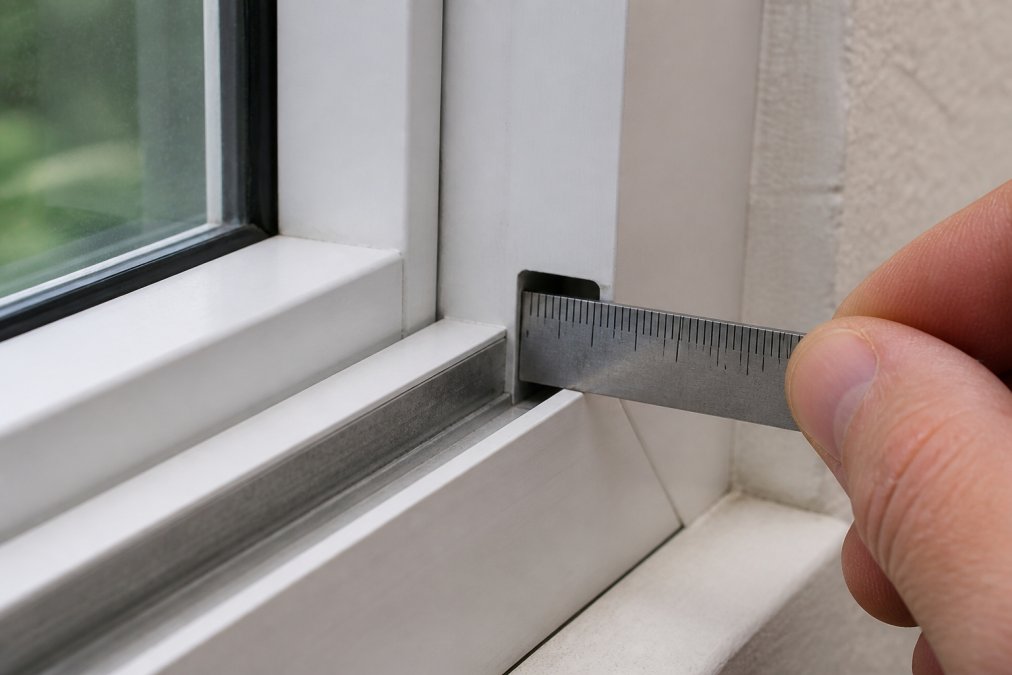
Frame depth is the distance from the front face of the window frame to the back of the screen channel groove. Measure this with a small ruler or depth gauge inserted into the channel at the corner.
Most residential aluminum window frames have a channel depth between 3/8 inch and 3/4 inch. The screen frame thickness must be compatible with this depth.
How to Identify Your Screen Channel Type
Screen channels fall into three main categories:
Standard aluminum channel: The most common type in residential windows built after the 1970s. The channel is a continuous groove running around the perimeter. Replacement screens slide in from one corner and are held by friction or a small spring clip.
Snap-in channel: Found on many vinyl windows. The screen frame snaps into a lip rather than sliding into a groove.
Tension spring channel (spring clips): Common on older aluminum windows and single-hung frames. The screen is held by spring-loaded clips on the side jambs.
To identify your type:
- Remove the existing screen if present and examine the channel corners.
- Look for a continuous groove (standard), a protruding lip (snap-in), or metal spring clips on the side jambs (tension spring).
- Measure the channel width at the narrowest point.
If unsure, photograph the corner of the channel with a ruler for scale and include it with your order inquiry.
How to Measure Windows for Custom Screens on Single-Hung Frames
On a single-hung frame, only the lower sash moves. The screen covers the lower portion of the window opening, held by the frame’s side channels and a horizontal rail at the meeting point of the upper and lower sash.
The measurement process:
- Measure the width of the window opening from side jamb to side jamb at the screen area.
- Measure the height from the window sill to the bottom of the upper sash rail (the fixed horizontal bar where the two sashes meet).
- Apply the standard 1/8 inch deduction to both dimensions for inside mount.
- Record the channel depth and frame thickness.
The most common error on single-hung windows is measuring to the full window height. A screen ordered to full height will be too tall to fit in the lower channel position.
If your single-hung window has a removable interior stop (a thin strip of wood or vinyl along the side jamb), remove it before measuring. Some older frames have stops that reduce the visible opening width by 1/4 inch or more on each side.
Troubleshooting Out-of-Square Windows
An out-of-square window is one where the opening is not a true rectangle. This is extremely common in homes built before 1980, where wood frames have settled or twisted over decades (the NIH).
How to check for square:
Measure both diagonals of the window opening, corner to corner. If the two diagonal measurements are equal (within 1/8 inch), the window is square (astm.org). If they differ by more than 1/8 inch, the window is out of square.
What to do with an out-of-square window:
- Use the smallest width and smallest height measurements for your order dimensions.
- Apply the standard 1/8 inch deduction to both.
- Accept that the screen may not seat perfectly flush at all four corners. A small gap at one corner is preferable to a screen that won’t fit.
- For severe out-of-square conditions (diagonal difference greater than 1/2 inch), consider an outside mount screen instead. The overlap compensates for the irregular opening.
Measuring for Solar Screens vs. Standard Mesh
Solar screens and standard insect mesh screens share the same frame measurement process, but they differ in mesh type.
Standard insect mesh (typically fiberglass or aluminum) is lightweight and sits easily in most residential screen channels. The frame measurement process applies directly.
Solar screens use a heavier, denser mesh, typically PVC-coated polyester. This affects two things:
- Frame profile: Solar screen mesh requires a frame with a deeper spline groove to hold the heavier mesh securely. Confirm with your fabricator that the frame profile accommodates solar mesh before ordering.
- Outside mount preference: Many installers prefer outside mount for solar screens because the screen needs to block solar radiation before it reaches the glass.
The measurement process for solar screens remains the same. The only difference is the mount type decision, which may shift you from inside mount to outside mount dimensions.
Your Measurement Record Worksheet
A measurement record worksheet prevents the most common ordering errors: transposed dimensions, forgotten deductions, and mismatched specifications.
Use this format for each window:
Window Measurement Record
| Field | Window 1 | Window 2 | Window 3 |
|---|---|---|---|
| Location (e.g., bedroom, kitchen) | |||
| Mount type (inside/outside) | |||
| Raw width – top | |||
| Raw width – middle | |||
| Raw width – bottom | |||
| Smallest width | |||
| Width after deduction | |||
| Raw height – left | |||
| Raw height – center | |||
| Raw height – right | |||
| Smallest height | |||
| Height after deduction | |||
| Channel depth | |||
| Channel type | |||
| Diagonal 1 (top-left to bottom-right) | |||
| Diagonal 2 (top-right to bottom-left) | |||
| Square? (diff < 1/8″) | |||
| Mesh type needed |
Print this worksheet and fill it in at the window before moving to the next one.
The single most important measurement habit is recording all three width readings and all three height readings for every window, not just one. Windows that appear uniform often vary by 1/8 inch or more across the span, and that variation determines your final order dimension.
Conclusion
Precision measurement is the difference between a screen that fits perfectly and one that ends up back in the box. If your windows are older, oddly sized, or out of square, the process takes a few extra steps, but none are difficult once you know what to look for.
Best Custom Screens builds every screen to your exact submitted dimensions, fully assembled and ready to install. Whether you need standard insect mesh, heavy-duty pet-resistant screening, or solar mesh for heat reduction, each screen ships with the custom fit your specific window opening requires. Submit a Request for Quote with your completed measurements and get a precision-fabricated screen built to last.
Frequently Asked Questions
Q: Should I measure the inside or outside of the window frame for a screen?
A: Measure the inside of the window opening, specifically the screen channel or track that the screen frame sits in. Place your measuring tape from the inside edge of one side jamb to the inside edge of the opposite side jamb for width, and from the head jamb channel down to the window sill channel for height. Measuring the outside of the frame will give you an incorrect, oversized dimension that prevents the screen from fitting into its mount.
Q: How do I account for window screen tracks when measuring?
A: Measure the full opening from channel to channel, then subtract a tolerance deduction, typically 1/8 inch from the width and 1/8 inch from the height for an inside mount. This clearance lets the screen slide in and seat correctly without binding. If your window uses spring clips or tension springs rather than a channel, measure the opening and deduct 1/16 inch per side. Always confirm the deduction with your custom fabrication provider before ordering.
Q: What is the difference between measuring for a full screen and a half screen?
A: A full-length screen spans the entire window opening from head jamb to sill, covering both sashes on a double-hung window. A half screen covers only the lower sash opening. For a half screen, measure from the bottom of the upper sash rail to the window sill channel rather than from the head jamb. Width measurement stays the same for both. Confirm which type your window hardware supports before ordering a custom fit.
Q: How do I measure for solar screens versus standard mesh?
A: The frame dimensions are measured the same way for solar screens and standard replacement screens, width and height of the window opening with the appropriate tolerance deduction applied. The difference is in the mesh specification, not the measurement process. Solar screens use a denser weave, typically rated by percentage of sunlight blocked. You select the mesh type separately when you place your custom fabrication order. Measure the window opening first, then choose your mesh.
This article was written using GrandRanker