
How to Measure for a Screen Door: Step-by-Step


Table of Contents
- Tools Needed to Measure Door Frame
- Understanding Your Door Opening and Finished Opening
- How to Measure Door Width at Three Points
- Measuring Door Height and Accounting for Obstructions
- Determining Door Swing: Left-Handed vs. Right-Handed
- Measuring for a Sliding Screen Door
- How to Measure Door Opening for Security Door Installation
- Handling Out-of-Square Frames and Custom Sizing
- Frequently Asked Questions
Last Updated: October 1, 2026
Tools Needed to Measure Door Frame
Accurate measurement starts with the right tools. You don’t need anything fancy, but precision matters.
A metal measuring tape is essential. Fabric tapes stretch and give inaccurate readings. Metal tapes stay rigid and provide the exact dimensions you need. Look for one at least 25 feet long with a clear, easy-to-read marking system.
Beyond the tape, keep these items handy:
- Notepad and pencil, Record measurements immediately. Don’t rely on memory.
- Level, Check if your door frame is plumb and square. Many older frames aren’t.
- Straightedge or level, A 2-foot level works well for checking frame alignment.
- Helper, Holding the tape at one end while you read at the other saves time and improves accuracy.
When you’re ready to measure for a screen door, having these tools prepared ensures you capture accurate dimensions the first time. Best Custom Screens recommends taking your time with measurements rather than rushing. A few extra minutes now prevents ordering a screen that won’t fit properly.
Understanding Your Door Opening and Finished Opening
Before measuring, understand the difference between the rough opening and the finished opening. This distinction is critical, and mistakes here are among the most common reasons screens don’t fit.
The rough opening is the space framed into your wall during construction. The finished opening is what remains after trim, molding, and casing are installed. When you measure for a screen door, you’re measuring the finished opening because that’s where the screen will actually sit.
The finished opening is typically smaller than the rough opening. Trim and casing take up space on all sides. If you measure the rough opening by mistake, your screen will be too large and won’t fit.
To identify the finished opening:
- Look at where the trim ends on your door frame
- Measure from the inside edge of the trim on one side to the inside edge of the trim on the other side
- This measurement defines your actual finished opening
- The finished opening is what determines whether you need standard or custom sizing
Common measurement mistakes and how to avoid them:
Measuring to the outside edge of trim instead of the inside edge is the most frequent error. This inflates your opening size by 0.5 to 1 inch on each side, resulting in a screen that’s too large. Always measure from the inside edge of the trim, the surface facing the interior of your home.
Another mistake is measuring the frame depth (how far the frame extends from front to back) instead of the opening width or height. Frame depth matters for sliding screens but should never be used as your width or height measurement.
Standard sizes versus custom sizing:
Common standard screen door sizes include 32×80 inches, 36×80 inches, and 36×96 inches. These dimensions fit the majority of residential openings. Before ordering custom, check whether your finished opening matches one of these standard sizes within a quarter inch.
If your finished opening is:
- 32-32.25 inches wide and 79.75-80.25 inches tall: Standard 32×80 will work
- 36-36.25 inches wide and 79.75-80.25 inches tall: Standard 36×80 will work
- Between standard sizes or outside these ranges: Custom sizing is necessary
If your opening doesn’t align with standard dimensions, custom sizing is the only option. Attempting to force a standard screen into a non-standard opening results in poor operation, gaps, and potential security issues.
Decorative trim and molding complications:
Decorative molding around your door frame can create measurement challenges. If the molding is ornate or extends significantly into the opening, it may interfere with screen installation. Measure the clear space inside the molding, not the overall frame dimension.
If molding protrudes more than 0.5 inches into the opening, note this when ordering. Custom screens can sometimes be built slightly narrower or with a recessed frame to accommodate decorative trim without requiring trim removal.
Document all measurements and take photos of your door opening from multiple angles. This visual record helps clarify any ambiguities when you’re ready to order and ensures you’re measuring the finished opening consistently.
How to Measure Door Width at Three Points
This is where precision separates a good fit from a poor one. Most people measure width at only one point. That’s a mistake.
Measure door width at three distinct points: top, middle, and bottom. Door frames aren’t always perfectly square. One side might be slightly wider or narrower than the other. Taking three measurements reveals whether your frame is out of square.
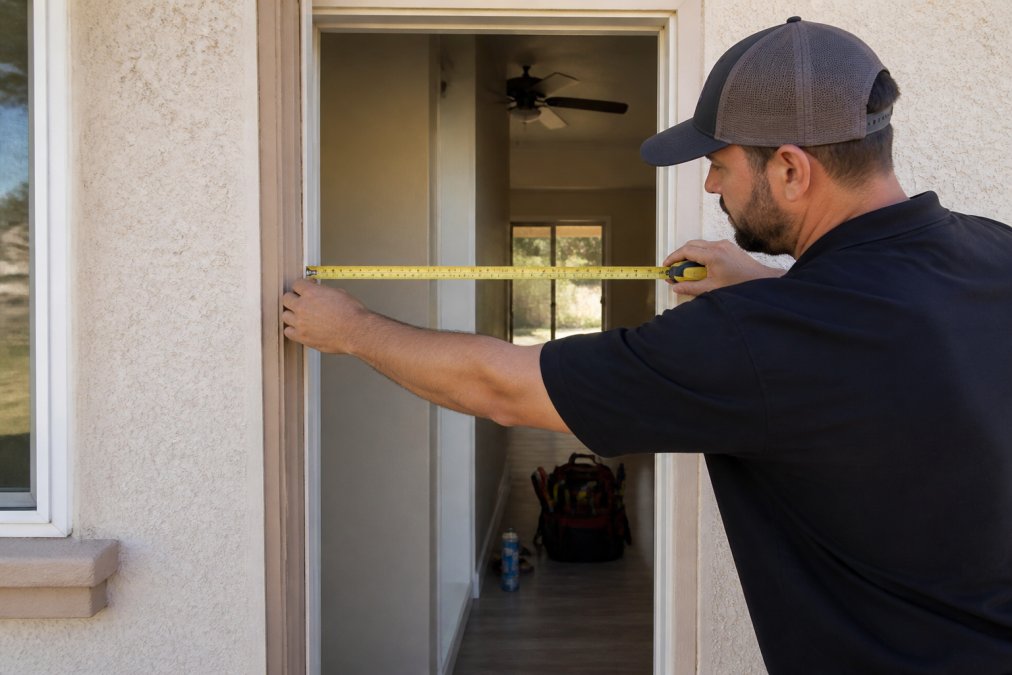
Consistent precision across these three points ensures a perfect fit for your screen door, a principle of accuracy that remains equally vital when measuring windows for shutters.
Here’s the process:
- Top measurement, Measure the width just below the header (the horizontal framing at the top)
- Middle measurement, Measure halfway between top and bottom
- Bottom measurement, Measure just above the door sill or threshold
Record all three numbers. If they differ by more than a quarter inch, your frame is slightly out of square. This matters when ordering how to measure for a screen door because the screen needs to fit the largest width.
Use the largest of the three measurements when determining your screen width. This ensures the screen won’t be too narrow for any part of the opening.
Measuring Door Height and Accounting for Obstructions
Height measurement is straightforward in principle but obstacles complicate things. Account for trim, molding, and hardware before measuring, and document each obstruction clearly.
Measure from the top of the door frame (inside edge of the header trim) down to the bottom (inside edge of the door sill or threshold). Take this measurement at least twice, once on the left side and once on the right side.
Common obstructions and how to measure around them:
- Door closer hardware: Mounted at the top of the door, these reduce usable height. Measure from the bottom of the door closer (not the top of the frame) down to the sill. Record the height of the door closer above the frame header, this tells the screen manufacturer how much clearance is needed.
- Threshold: Raises the bottom of the opening, reducing available height. Measure from the top of the threshold (the surface the screen will rest on) to the top of the frame. If the threshold is higher than 1.5 inches, note this, it may require a custom frame configuration.
- Decorative molding: Trim around the frame takes up space. Measure from the inside edge of the top molding to the inside edge of the bottom molding. Do not include the molding thickness in your height dimension.
- Weatherstripping: Adds thickness to the frame edges. If weatherstripping is present, measure the clear space inside it. Weatherstripping typically adds 0.25 to 0.5 inches of thickness; this doesn’t affect your height measurement but should be noted if it’s unusually thick.
Recording obstruction details:
Create a simple sketch or note for each obstruction:
- Location: Top, bottom, left side, right side, or center
- Type: Door closer, threshold, molding, weatherstripping, or other
- Approximate size: How much space it occupies (e.g., “door closer extends 3 inches down from header”)
- Impact on measurement: Does it reduce usable height, or is it outside the screen installation area?
Measuring with uneven settlement:
When obstructions require custom sizing:
Determining Door Swing: Left-Handed vs. Right-Handed
Door swing determines which direction the screen opens. Getting this wrong means the screen won’t operate smoothly.
Measuring for a Sliding Screen Door
Sliding screens work differently than swinging doors. The measurement approach changes slightly.
Check for obstructions in the track area:
- Weatherstripping that extends into the track
- Hardware that protrudes into the slide path
- Uneven thresholds that could catch the screen
How to Measure Door Opening for Security Door Installation
Security screens demand more precision than standard screens. They’re heavier and bear more stress.
- Rot or soft spots in the wood
- Loose trim or molding
- Cracks in the frame
- Rust on metal frames
Handling Out-of-Square Frames and Custom Sizing
Real-world door frames rarely sit perfectly square. Older homes especially show frame irregularities. Out-of-square frames don’t mean you can’t install a screen. They just require thoughtful measurement and custom sizing.
When your frame is out of square:
- Use the largest measurement for width
- Use the largest measurement for height
- This ensures the screen fits the widest points
- Small gaps can be shimmed during installation
Frequently Asked Questions
Do I need to measure the door frame or the existing door?
Measure the finished opening, which is the actual space where your screen door will fit. This is the interior edge of the door frame, not the door itself. The finished opening determines whether you need a standard size or a custom fit. If your opening is irregular or out-of-square, precise measurements of the frame are critical for a proper installation.
How do I measure for a sliding screen door?
For sliding screen doors, measure the width at three points (top, middle, bottom) and the height at both sides. Record the smallest width and height measurements. Check the threshold height and any obstructions that might interfere with the door’s track. Sliding doors require accuracy on the width measurement since they must fit smoothly into the track without binding.
What’s the difference between standard and custom screen door sizes?
Standard screen doors come in preset dimensions like 32″ x 81″ or 36″ x 81″. Custom sizes are made to your exact measurements, ideal for older homes, non-standard openings, or frames that are out-of-square. Custom sizing ensures a precision fit and eliminates gaps that insects or pests could exploit. If your measurements don’t match standard dimensions, custom is the better choice.
Why should I measure at three points instead of just once?
Many door frames settle over time or were never perfectly square during installation. Measuring at three points (top, middle, and bottom for width; left and right for height) reveals whether your frame is plumb and square. If measurements vary significantly, your frame is out-of-square, and you’ll need to account for this when ordering or installing your screen door to avoid gaps or binding.
Accurate measurement is the foundation of proper screen door installation. Take your time with the process. Record all measurements clearly. When you’re ready to order, provide complete details about your frame condition, door swing, and any obstructions. Best Custom Screens uses precise measurements to build screens that fit perfectly and operate smoothly for years.